
To sort a table, follow these steps:
-

-
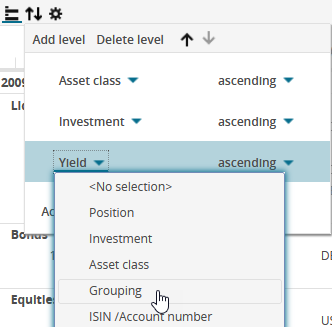
Select the relevant column(s) from the drop-down list.
-
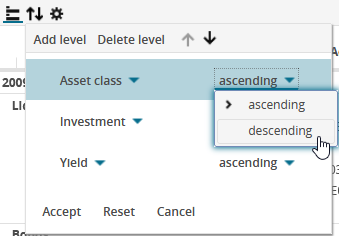
Specify if the rows are to be sorted in descending or ascending order.
-
Finally, click the "Apply" button.
This resorts the table.
The following elements are available for sorting:
|
Element |
Description |
|---|---|
|
Add level |
Select this command to add an additional column (that is, an additional sorting level). |
|
Remove level |
Click this command to remove the currently marked level from the sorting dialogue window. |
|
|
Click this icon to move the currently selected column up or down. The table is sorted by the first or top column. |
|
Column drop-down lists |
In the drop-down lists, select the columns by which you want to sort. In the drop-down lists to the right, select for the corresponding column whether to sort it in ascending or descending order. |
|
Apply |
After configuring the sorting, click this button to resort the table. |
|
Restore |
Click this button to undo your change and restore the default table. |
|
Cancel |
Click this button to close the sorting dialogue window without applying the sorting. |
The sorting of a table cannot be saved permanently, that is, beyond the work session.
To start the sorting even faster, just click the corresponding column header. Click again to reverse the sorting order.